
Upgrading Your Electric Scooter with LED Lights: A Step-by-Step Guide
Meta Description: Discover how to enhance the aesthetics of your electric scooter by installing LED lights. Dive into our detailed guide and get illuminated!
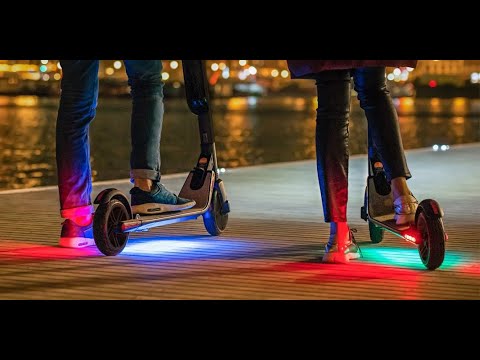
Ever thought about giving your electric scooter a vibrant, glowing upgrade? LED lights not only enhance the aesthetic appeal but also improve visibility during nighttime rides. In this guide, we'll walk you through the process of installing LED lights on your scooter, even if you're a complete beginner. Let's illuminate your ride!
Installing LED Lights on an Electric Scooter | Presented by T-Dot Wheels
Unboxing the LED Kit
When purchasing LED lights, especially from online platforms like Amazon, it's essential to know what's included in the package. Our kit came with:
- A light strip wrapped with USB cables.
- Double-sided tape for secure attachment.
- A battery pack that requires three AA batteries.
- A pouch designed to hold the battery pack.

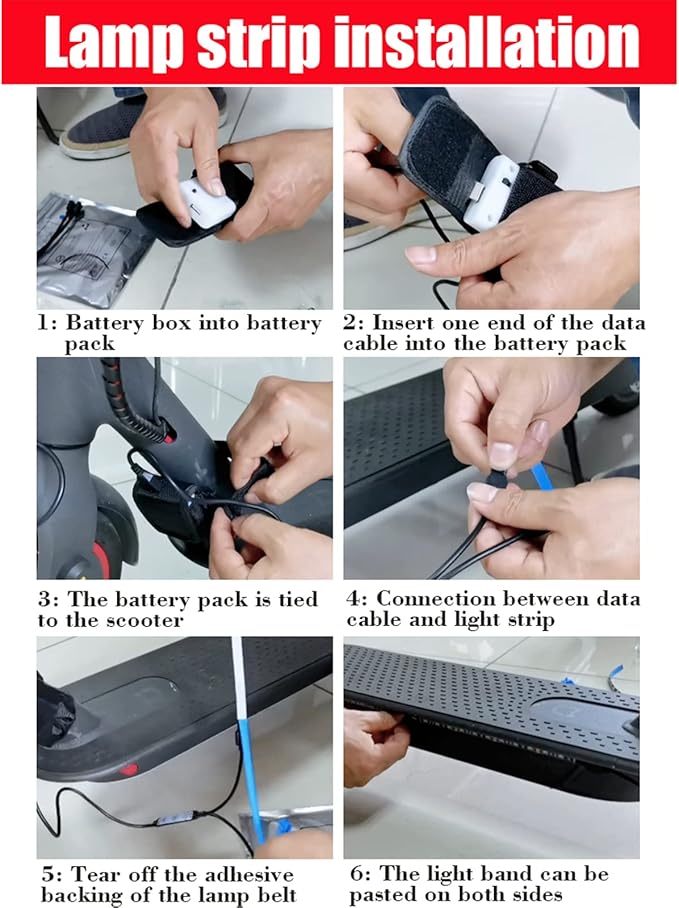
Setting Up the Battery Pouch
Before diving into the lights, it's crucial to set up the battery pouch. This pouch should be installed at the front of the scooter. Ensure it fits snugly and doesn't slide around too much, especially when riding. The last thing you want is the battery pack falling out during a ride!
Testing the Lights
Before going any further, it's a good idea to test the lights. Plug in the USB, and if they light up, you're good to go! If not, you might want to check the product's reliability, especially if purchased from less-known online sellers.
Installing the LED Lights
The actual installation can be a bit tricky, especially if the package doesn't come with instructions. Here's a step-by-step process:
- Unwind the lights. Some kits come with buttons on the wire, allowing you to customize the light mode, flash speed, and colour.
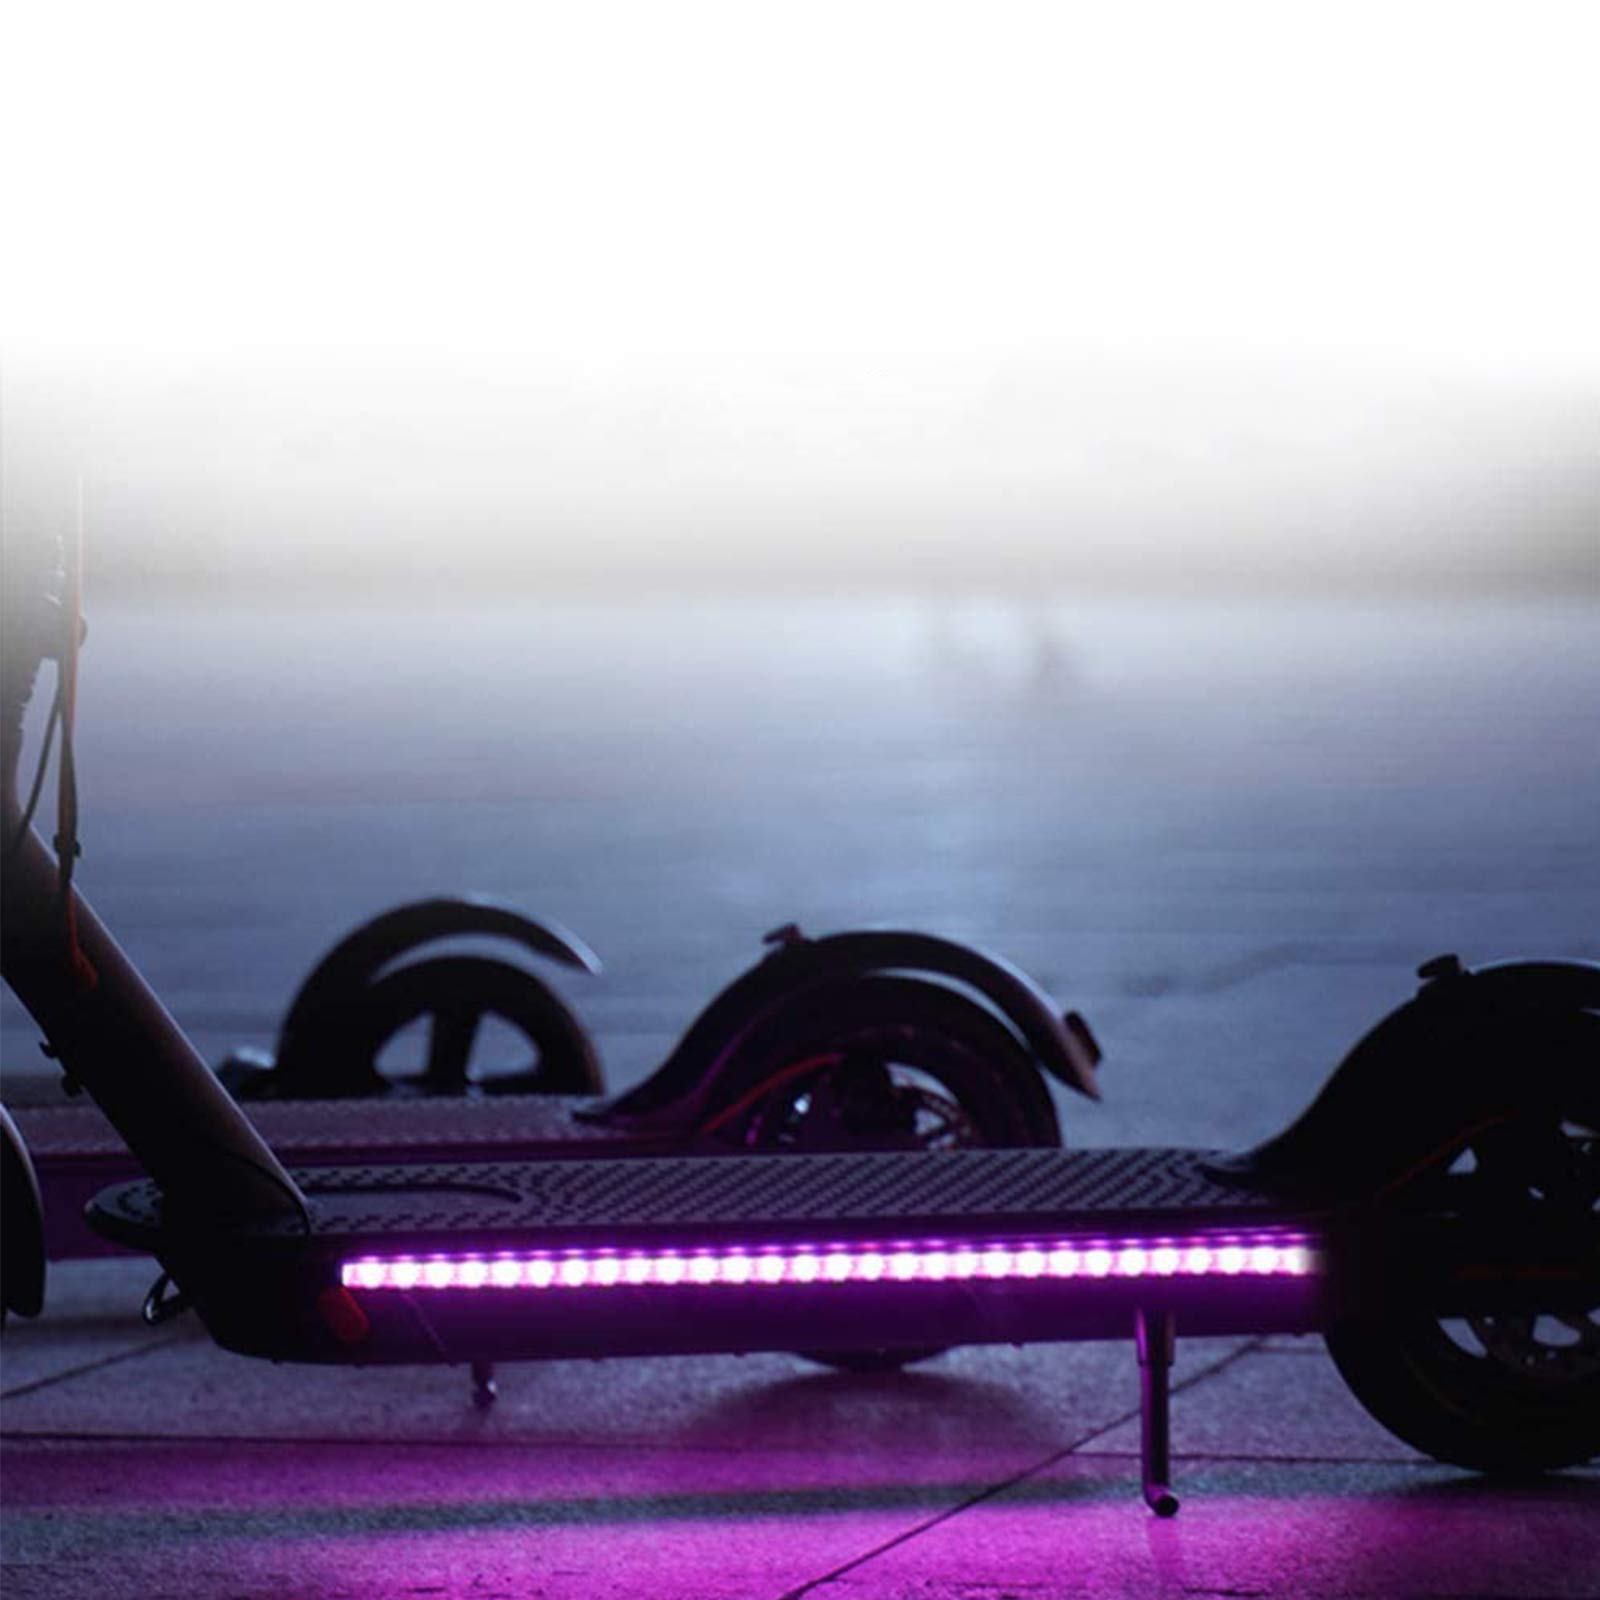
- Align the lights on the desired side of the scooter. For our guide, we placed them underneath to avoid a tacky look.
- Use double-sided tape to secure the lights. Ensure the tape is strong enough to hold the lights, especially during rides on rough terrains.
- Repeat the process if you wish to install lights on the other side of the scooter.
Customizing Your Lights
One of the perks of LED lights is customization. Depending on your kit, you can choose between different modes, flash speeds, and colours. Whether you prefer a steady glow or a rhythmic flash, there's likely a setting that suits your style.
Final Thoughts
While installing LED lights can give your scooter a unique look, it's essential to consider the quality of the product. Some third-party lights might not be worth the investment. If you're keen on having lights, consider purchasing scooters that come pre-installed with them, like the Inmotion or Kugoo G2 Pro.
LED lights can be a fun addition to your electric scooter, enhancing both its look and safety. However, always prioritize quality over aesthetics. If you decide to go for it, we hope this guide helps you in your installation journey. And remember, always ride safely and brightly!